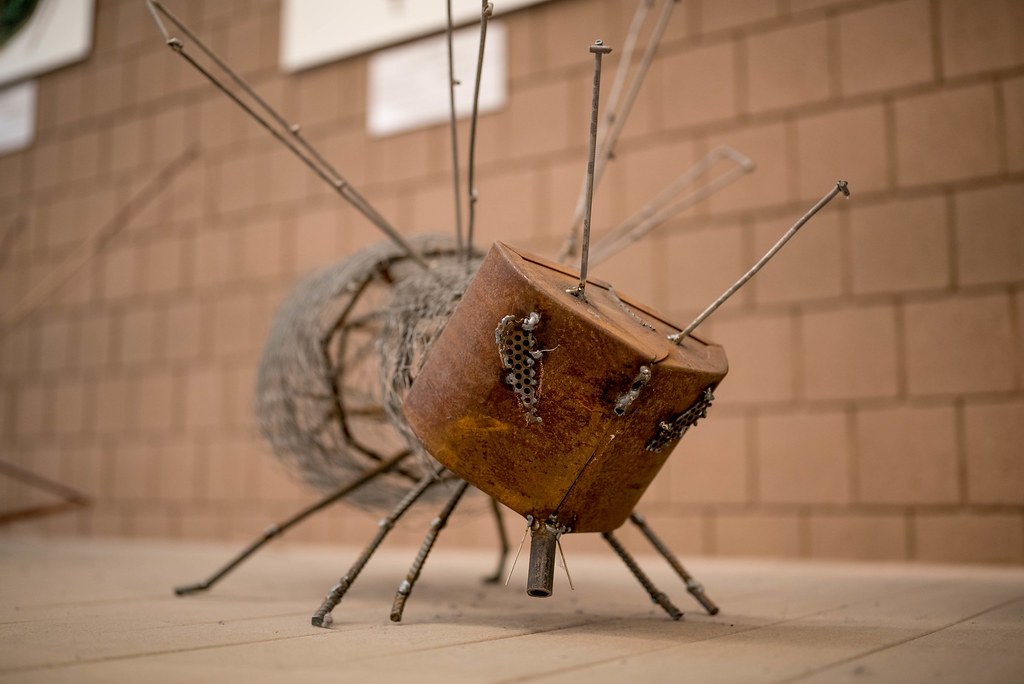
• Skip to main content

Weekly Fifty

Exploring the wonders of creation through a 50mm lens...and other lenses too.

  • Subscribe
  • YouTube
  • About

Cosmic Cavortation

March 20, 2019 4 Comments

DSC_2469.jpg

I don’t know how many pictures I’ve posted here that began with me sitting in my usual sport for my morning prayer, looking out the window, and having an idea for a photograph suddenly hit me. It’s a lot, that’s for sure. That’s exactly what happened here, and this started like many others with me sitting in our living room looking in a southwest direction as I prayed for the day, for my family, for my friends, and other things that were on my heart that morning. The sky was still dark at 5:45am so when I looked out I could clearly see the crescent moon being trailed by a dot that, thanks to my SkyGuide app, I confirmed was actually the planet Venus.

My first thought, photographically speaking, was that I wished I had a better camera and lens to capture a shot of these two celestial bodies entwined in a cosmic dance for a short moment in those pre-dawn hours. Then I realized that I could probably get a decent image with my 70-200mm lens and Nikon D7100 camera, thanks to the huge amount of room those 24 megapixels offers when it comes to cropping. It was also super cold so I knew I didn’t have a lot of time to take the shot, but I figured I might as well give it a try and see what happened.

I’ve learned that when taking pictures of the moon, exposure can be a tricky thing. You need a fast shutter since it’s actually moving pretty quickly across the sky, and anything less than 1/90 probably won’t cut it. You need to limit the amount of light coming in when shooting a full moon because it’s actually pretty darn bright (it is reflecting the sun, after all) and a low ISO helps to preserve the rich texture and details of the surface. All that is well and good but doesn’t help much with just a sliver of the moon in view, which is what I had to work with here. There just isn’t much light available, so you have to get things just right or your photo will turn out a muddy mess.

Shooting at f/2.8 definitely helped because I could let in a ton of light, and when there’s not much to begin with, that’s always a good thing. I tried different shutter speeds and realized that I could get a reasonably good shot at 1/90 second, but anything below that was just too blurry from the motion of the moon. I set my ISO at 100 to get a super crisp, detailed shot and make sure I had enough photo information to work with in post in case I needed to do some editing. In retrospect I probably could have adjusted some of those parameters a bit (shooting at ISO 200 and 1/125 second, perhaps. And also zooming to 200mm, which I somehow forgot to do. The picture was shot at 180mm! Grr…) I used the good old focus-and-recompose technique (thanks back-button focusing!) to get the moon nice and sharp but then adjusting the composition slightly to include Venus just below and to the left.

I’m really pleased with how this turned out, and though it would have been cool to get Jupiter in the shot as well, it would have required a massively different composition with a much smaller moon and more zoomed-out view overall. The shot you see here was cropped quite a bit but I really like the level of detail it contains on the surface of the moon, and I hope it’s obvious that there are two celestial bodies here, the moon and Venus, but hopefully people will pick up on that without too much effort.

Read my educational photography articles at Digital Photography School

Footbridge

March 13, 2019 2 Comments

FUJI4380.jpg

This pictures serves as a bit of a companion piece to the one I shared two weeks ago which was taken at an Outdoor Classroom by one of the elementary schools here in town. This was the same location but a bit further down the path and I wanted to snap a picture that sort of caught the essence of the afternoon, but didn’t want it to be forced or artificial. To that end I kind of snuck up behind my kids (running ahead and leaving my poor wife in the dust, albeit briefly) and popped off a couple images in rapid succession while they walked down a path. When I checked them on my camera I noticed something, though: too much of the scene was in focus. I had the lens on my Fuji X100F set to f/5.6 because there was plenty of light and I was using the mechanical leaf shutter which doesn’t work at high shutter values when shooting wide open at f/2.0.

Normally my solution to this is to simply stop down my lens, which is what I did here originally, but from a compositional standpoint I really wanted the kids in focus but the background to be a little blurry so as to draw the viewer’s eye to the children but still have a sense of place and context. I quickly changed to M+E shutter which forces the camera to use the mechanical shutter as long as it can, but then activate the electronic shutter if necessary. Then I dialed in an f/2.0 aperture, set my camera to 8fps drive mode, and caught up once again with my kids as they were crossing this bridge. And I was able to get the shot I was hoping for.

I know a lot of people tend to value the simplicity of mobile phone cameras but this image, to me, is a lesson in the value of learning how to manually control a camera to get the shot you want. A mobile phone would have been able to approximate this shot but the depth of field would have been so wide that the entire scene would be in focus. Portrait Mode could be used, if shot with a phone that supports it, but that only works with subjects that are close to the lens. In this case with subjects several meters away Portrait Mode would have been useless. I knew what I wanted my picture to look like, knew how to control my camera to get it, and am really happy with the result. That’s not to say mobile phone cameras are not value and capable and worth having…but just illustrates that sometimes it’s nice to have a dedicated camera and also know how to make it do what you want :)

Side note: This post roughly marks six years of me doing Weekly Fifty, and I wanted to thank all of you who have been a part of this blog for so long. I appreciate your comments, your support, and even your questions about photography. Thank you, and here’s to many many more years of weekly pictures :)

Read my educational photography articles at Digital Photography School

Magic Tree

March 6, 2019 Leave a Comment

FUJI4031.jpg

Each year an artist named Will Treelighter, in Columbia, MO, wraps a few trees with lights. I don’t mean a couple hundred or even a couple thousand, though. I mean more like tens of thousands of lights, all different colors and all lit up and glowing and all free for anyone to come look at. These trees really are a sight to see and if you ever find yourself in the area with some time to spare I highly recommend giving it a look.

When we were in Columbia visiting family over Christmas we made sure to check out the trees and I brought my Fuji X100F to see if I could get a picture worthy of Weekly Fifty. One big issue was the fact that we had our kids with us which wasn’t really a problem, because it would be silly and selfish not to bring the kids, but added some challenges and constraints in terms of getting a picture. For one, I didn’t want to spend half an hour ignoring my boys while my wife and mother-in-law got to enjoy the tree lights. It was also cold, and we had a time constraint in that we were up against the boys’ bedtime and I didn’t want to sacrifice that for a blog photo.

I had my tripod with me and tried a few long-exposure shots from about a hundred yards away but they just didn’t seem to capture the scope and scale of the trees, so I shifted things around and went for the opposite approach of getting real close instead of real far. When I got this shot we were about one minute away from heading home and I had to think fast, so I ran up to the tree, put my camera in manual focus, and got a couple pictures of this green bulb with a thousand points of light in the background behind it. I still don’t know if it quite captures the essence of what these trees really look like, but somehow this seemed to do a better job and result in a more colorful image than any that I shot from far off.

I guess the lesson to be learned here, if there is one, might be that shifting your perception of a scene can lead to some dramatic results much different than what you might expect but equally interesting in their own right. And maybe next year I’ll be able to experiment with some different types of images with these trees, as long as my kids cooperate :)

Read my educational photography articles at Digital Photography School

Outdoor Classroom

February 27, 2019 Leave a Comment

FUJI4349.jpg

In some ways this picture reminded me of one I shared a few weeks ago from Arcadia Lake, and certainly the composition is quite similar in a lot of ways. Like that one, this was shot with my Fuji X100F from the ground looking up at the sky through a forest of bare trees. The foreground dominates the frame with a bit of a green patch on the left, the horizon lines are roughly equal, and both images were taken at a lake. Suffice it to say the first image was certainly on my mind when I shot this one, and that’s one of the fun things about photography: learning from your earlier shots and letting them inform your approach to subsequent pictures.

What might not seem obvious when looking at this one is that the setting is, in fact, vastly different. Instead of a huge lake at a state park, this one was taken at an outdoor classroom on the southwest side of town. The lake in this image is actually just on the other side of the patch of trees and it’s…oh, about maybe a quarter of an acre in size. You’d never know it from looking at the picture though, and what you also don’t see is the middle school just out of frame as well as the elementary school behind me. Nothing has been photoshopped here, just cleverly hidden thanks to how I composed the shot.

So what happened was, my wife and I took our boys to this spot on a chilly Saturday afternoon in late January when we needed to get them out of the house for a little while. The park we usually go to was kind of a non-starter since we had just been there a few days prior and the kids tend to do better with a change of scenery, so we went here and basically just let them wander around on the dirt paths for an hour and a half. They vacillated between throwing sticks into the water and finding out where various trails went, and even though their pants and shoes were much more muddy than we anticipated a great time was had by all and we left feeling like we had done something useful with the time. Not life-changing or earth-shattering, but hopefully better than sitting inside all day :)

Read my educational photography articles at Digital Photography School

Skylight

February 20, 2019 5 Comments

Skylight

I promise this wasn’t processed through some type of Instagram-style photo filter. The sky really did look like this on the morning of January 10, 2019. When I pulled out of my driveway on my bike I could see that the sunrise was, for whatever atmospheric reasons cause these sorts of conditions, going to be especially rich and beautiful. As I rode past the vacant lot just south of my house I paused to take a few shots but they didn’t really do a great job of capturing the scene, especially with my D7100 and 50mm lens. So on I went until I got to the parking lot behind Hobby Lobby with an empty tree-filled field just to the southwest. I looked behind me to the east and it looked like the sky was positively blazing.

The tricky thing about photographing sunrises and sunsets is that it’s almost impossible to get the vision in real life to translate to a digital facsimile. Colors are never as vivid, and vistas are never as scenic, as when you see them in person with your own two eyes. That doesn’t mean you shouldn’t try though, and even though I only had my 50mm lens I figured I would do what I could to make the most of the situation. I shot a couple images with trees in the foreground but then realized that eliminating them altogether might result in a more interesting image, even though a picture of the sky alone kind of removes the possibility of context. And you know how much I emphasize context… :)

To capture the richness of the colors I underesposed the image by two full stops, and here’s what the RAW file looked like as a result:

Even in this picture the clouds are such a deep red that it’s almost difficult to believe unless you saw it with your own eyes. I didn’t want to lose those colors but I did want to punch up the sky just a bit to make the final image more accurately represent what I actually saw. I promise I didn’t adjust the saturation levels at all, and most of the editing was just adjusting the brightness of the dark areas as well as a bit of cropping on the bottom.

A few minutes later, as I turned to look behind me while waiting for a stoplight to change from red to green, I saw that the scene was almost entirely gone. Instead of a rich amber glow the sky was now a much more normal shade of blue and orange, wholly unremarkable. It’s amazing how quickly some photographic moments pass, and I’m glad I was able to capture just a bit of this one while I had the chance.

Read my educational photography articles at Digital Photography School

  • « Go to Previous Page
  • Page 1
  • Interim pages omitted …
  • Page 72
  • Page 73
  • Page 74
  • Page 75
  • Page 76
  • Interim pages omitted …
  • Page 138
  • Go to Next Page »

Copyright © 2026 Creative Commons License
This work is licensed under a Creative Commons Attribution-NonCommercial-NoDerivs 3.0 Unported License.